Auto-pay lets Tenantify charge your saved card on each upcoming due date so you stop thinking about payments. The setup has two parts: you save a card through Paystack during any normal payment, then you flip the toggle in Settings to activate recurring charges. Before every charge, Tenantify sends you a reminder three days in advance, so a surprise debit is impossible.
Who this is for
Tenants who want rent (and service charge) debited automatically on each due date, without having to log in and click Pay every time. Works for monthly, quarterly, and annual payment frequencies.
What you’ll get done
A card saved with Paystack, auto-charge enabled in your Tenantify settings, and a clear picture of the next scheduled debit: date, amount, and reminder.
Before you start
- A Nigerian debit or credit card you intend to use for every future payment. Bank transfers and USSD cannot be saved for recurring charges; only card payments save an authorisation.
- At least one successful card payment through Tenantify. If you have not paid yet, make your first payment first, then come back here.
How auto-pay actually works
- Cards are stored by Paystack, not by Tenantify. Paystack is PCI-DSS certified; we only see the last four digits of your card for your own reference.
- Each auto-charge debits the base amount plus the 3% platform fee, identical to a manual payment.
- Charges run on the next due-date in your payment schedule (monthly, quarterly, or annual). Tenantify reads the actual schedule, not a fixed calendar offset.
- You receive a reminder three days before each scheduled charge.
- You can disable auto-charge at any time with one click.
Steps
1. Make a card payment with “Save card” ticked
Start a normal rent payment as you would from your Payments page. When the Paystack checkout opens, choose Card Payment. Below the card number field you see a checkbox labelled Save card for future payments. Tick it.
Complete the payment as usual. Paystack stores the card securely and returns an authorisation reference to Tenantify.
If you normally pay by bank transfer or USSD, pay once with card this time. Subsequent payments can go back to any method if you prefer; the saved card stays on file for auto-pay only.
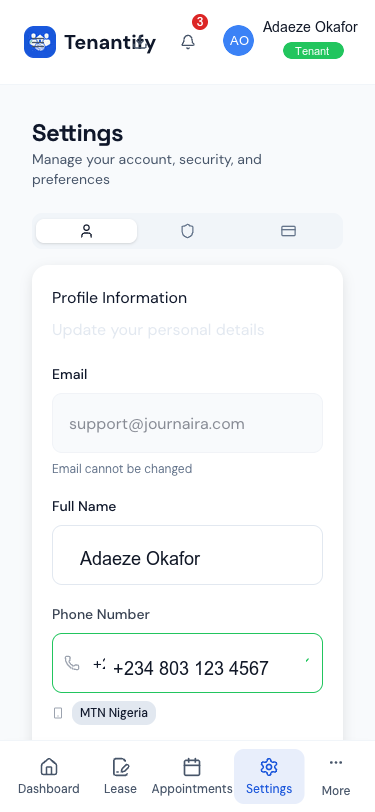
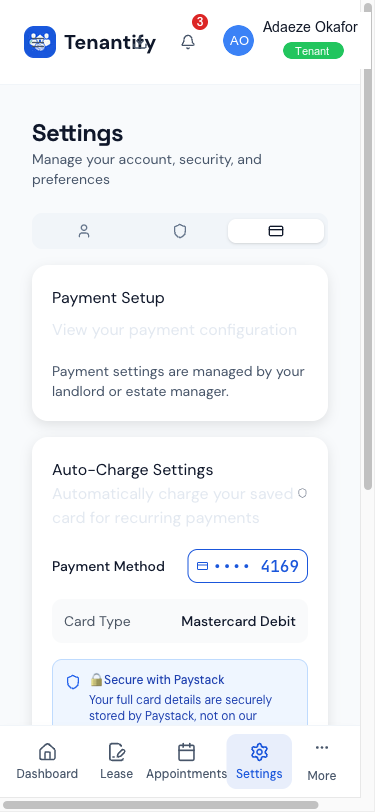
2. Open Settings and go to Payment
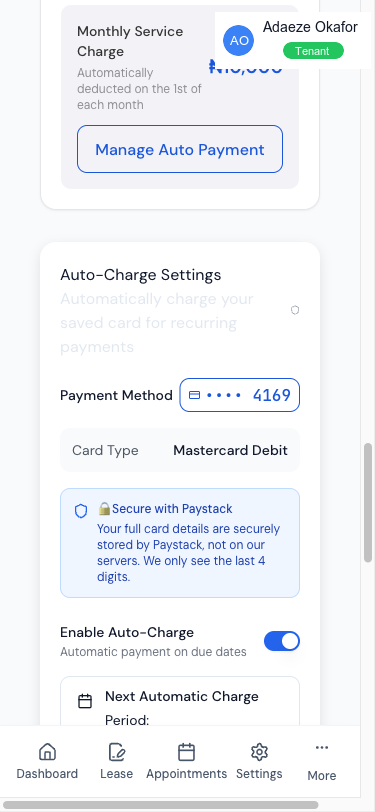
From your dashboard, open the Settings menu (drawer on mobile, sidebar on desktop), then the Payment tab. The Auto-Charge Settings card shows the card you just saved, with its last four digits and card brand.
3. Review the next charge preview
Below the card, Tenantify shows a preview of what will happen when you enable auto-charge:
- Period. The next period to be debited (e.g. "November 2026" for monthly, "Q1 2027" for quarterly).
- Amount. Base rent plus service charge plus the 3% platform fee, in Naira.
- Scheduled for. The exact date Tenantify will attempt the charge — read live from the next due-date in your payment schedule.
If the amount looks wrong, speak to your landlord before turning auto-charge on. A mismatch usually means a recent rent review or a service-charge change you have not seen yet.
4. Toggle auto-charge on
Flip the Enable Auto-Charge switch. A confirmation dialog reminds you of the terms:
“Your card will be automatically charged [amount] on each upcoming due date on your schedule. You’ll receive a reminder 3 days before each charge.”
Click Enable. The toggle locks on and a green banner confirms the next charge date.
5. What happens on the charge date
The timeline looks like this for every scheduled charge:
- Three days before the due date. Tenantify sends you a reminder by email and in-app notification. The email names the amount, the period, and the exact debit date Tenantify has on file. If anything looks off, you can disable auto-charge from this reminder or log in and pay manually.
- On the due date. Paystack charges your saved card silently. A receipt lands in your inbox within minutes, the schedule row flips to PAID, and your landlord’s dashboard updates at the same time.
- On success. Nothing more needed.
- On failure (card expired, insufficient funds, bank block). The schedule stays PENDING and you receive a notification explaining why. You have time to pay manually before overdue flags appear on your landlord’s dashboard. Auto-charge does not retry by itself.
Turning auto-charge off
Return to Settings > Payment and flip the toggle off. The change is immediate. Next period reverts to manual payment. No penalty, no waiting period.
If something goes wrong
Toggle is disabled and greyed out. No saved card is on file. Pay once with the card you want to use, making sure to tick Save card for future payments on the Paystack checkout. The toggle unlocks on your next visit to the settings page.
Saved card shows old last-four digits. The authorisation is tied to a specific card. If your bank issued a replacement card, pay once with the new card (ticking save) and the new card takes over on your next visit.
This month’s reminder did not arrive. Check your spam and promotions folders. You can always log in and see the next charge date on the Auto-Charge Settings card, which is the single source of truth regardless of email delivery issues.
The charge failed. Paystack returns the reason (insufficient funds, card blocked, expired). Pay manually to clear the period, and update your saved card if needed by paying once with a new card.
Amount changed but auto-pay still shows the old figure. The old authorisation is tied to a specific amount. Disable auto-charge, then re-enable. Paystack re-calculates using the current agreement figures.
What’s next
Keep records for every debit. Downloading Your Payment Receipts shows how to access individual receipts and bulk-export a full tax year.