
Every naira the fund spends belongs on a statement at the end of the period. The Expenses page is where you record each one — the security guard’s salary, the diesel for the generator, the gateman’s replacement uniform — against the active budget. Five minutes of logging at the time of spend prevents an afternoon of guesswork at statement time.
Who this is for
Estate managers with an active budget who need to log fund spending as it happens.
What you’ll get done
A live expense log that matches the estate’s actual spend, with each entry tied to a budget category so the statement reconciles cleanly at the end of the period.
Before you start
- A budget must be active. If none exists, create one at
/fund/budgetsfirst. - For each expense: title, amount, category, vendor name, date, and optionally a receipt or invoice document.
Steps
1. Open Expenses
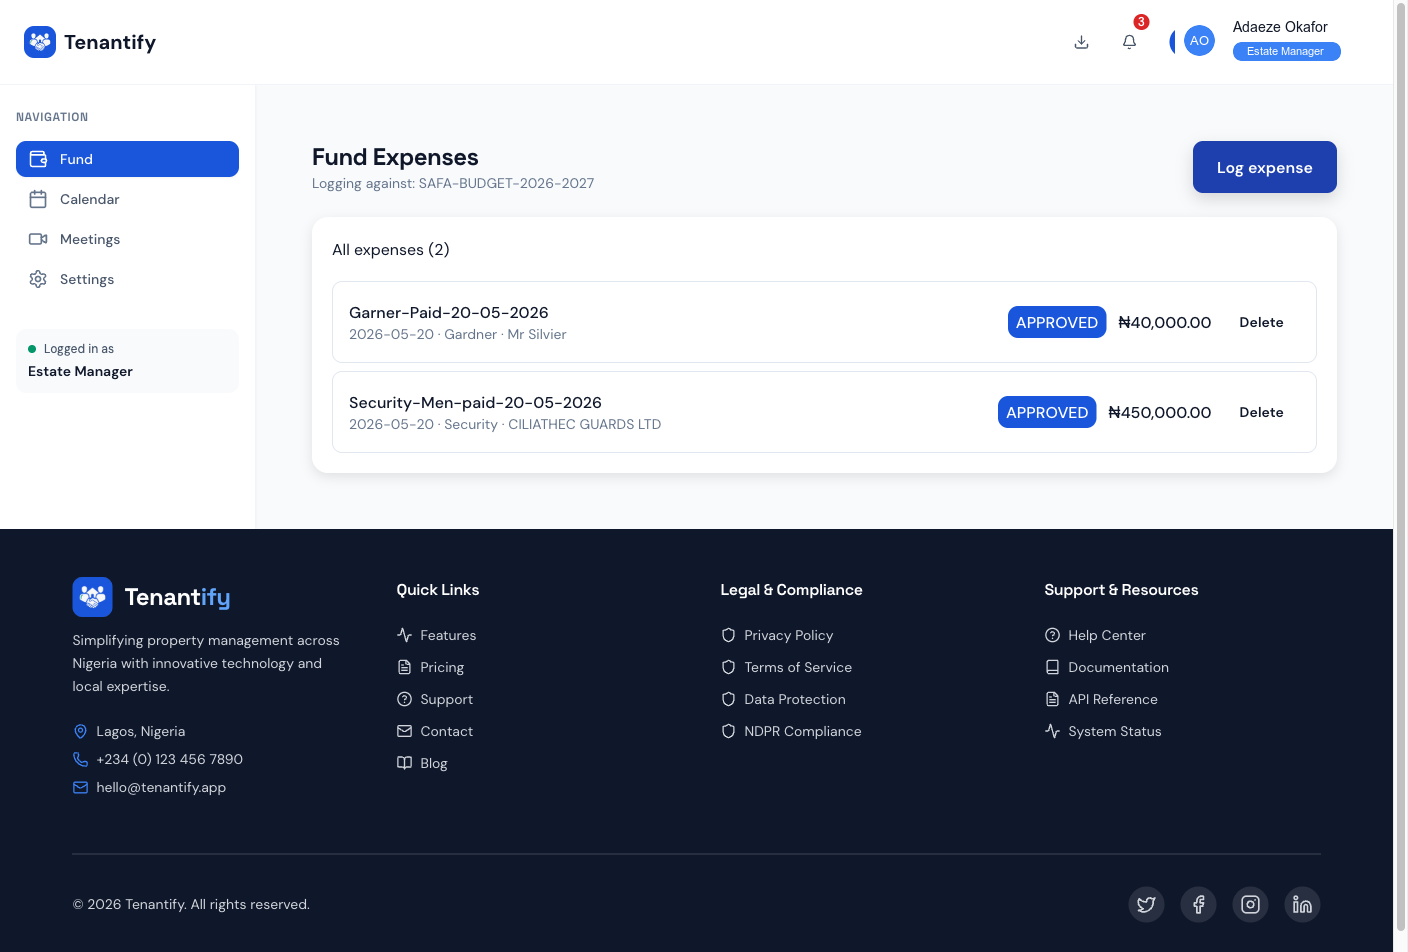
Open Expenses from the menu (URL: /fund/expenses). The page shows the active budget name at the top, the running total spent against it, and a list of every expense logged.
If the Log expense button is greyed out, no budget is active. Open /fund/budgets, create one, and mark it Active.
2. Click Log expense
A form opens. Fill in:
- Title. A short, recognisable name (e.g. “June diesel delivery”).
- Amount. Naira figure, no decimals.
- Category. Choose from the active budget’s categories (Security, Utilities, Repairs, Cleaning, and so on, as defined when the budget was created).
- Vendor name. Whoever was paid (e.g. “Total Filling Station”).
- Expense date. The day the spend actually occurred, not today.
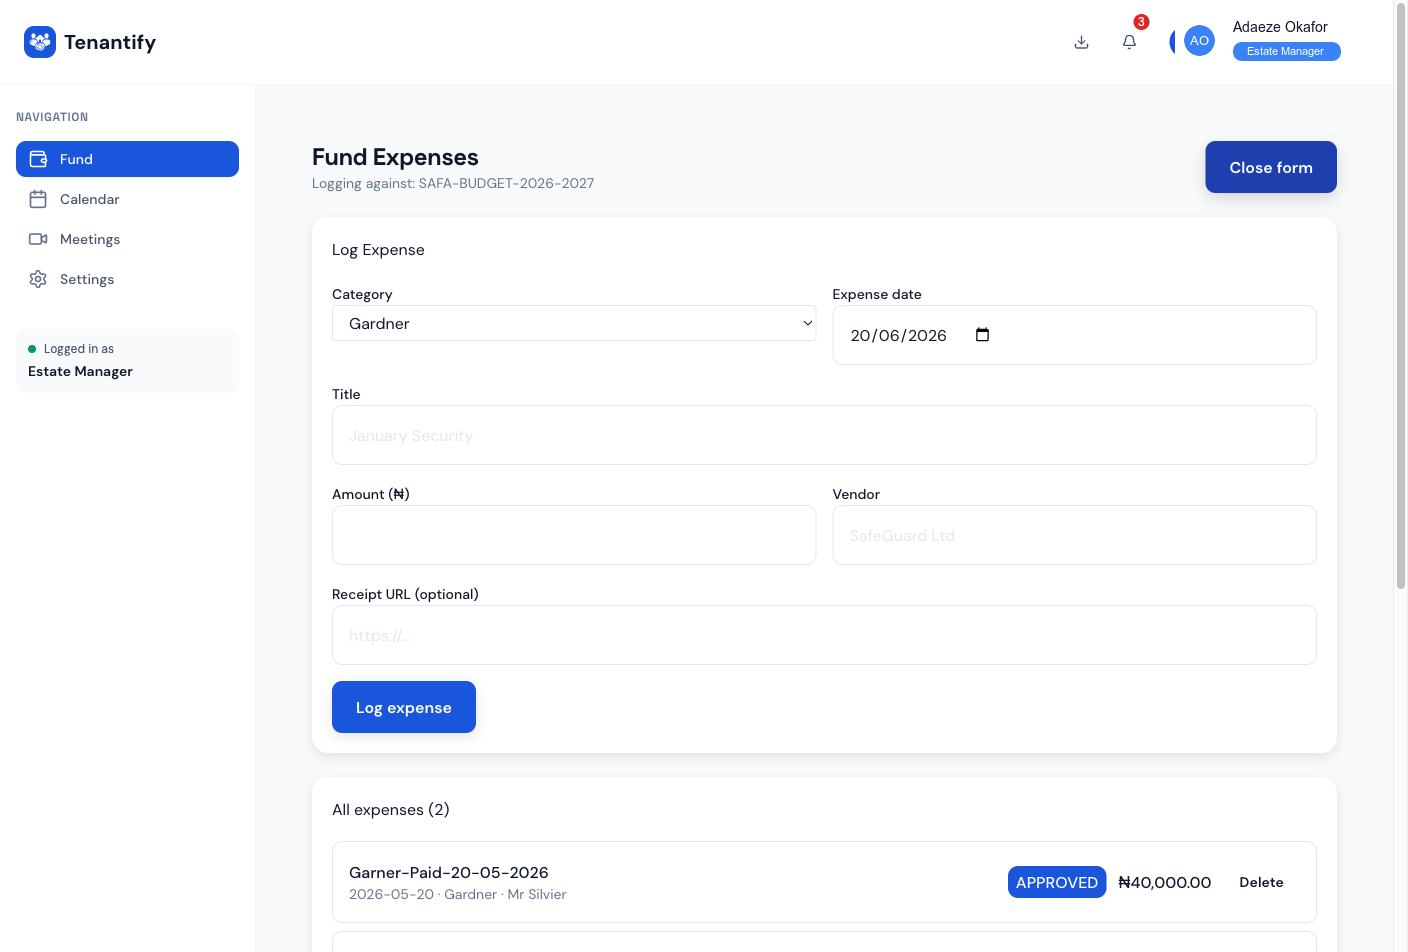
3. Attach a document (optional but recommended)
If you have a receipt or invoice photo, click Upload document and select it. PDFs, JPEGs, and PNGs all work. The document is stored against the expense and surfaces in the statement detail view.
For audit trail purposes, attach the receipt whenever you have one — even for routine recurring spend. It pre-empts disputes at statement time.
4. Submit
Click Save expense. The entry appears immediately at the top of the list with a PENDING status badge. As you mark expenses APPROVED or PAID (via the row menu), the badge updates and the statement category running totals adjust in real time.

5. Delete an expense (corrections only)
If you logged the wrong amount or attached the wrong receipt, click the trash icon on the row and confirm. Delete only fixes mistakes; do not delete real expenses to make the books look better. The audit trail flags deletes after a statement is published.
How expenses feed statements
Each expense rolls into the matching budget category on the active period’s statement. The statement detail view shows:
- Budgeted amount per category (from the budget).
- Spent amount per category (sum of expenses).
- Variance (budgeted − spent).
A red variance flags over-spend; a green one shows under-spend. Residents see the same view when the statement is published, which is the entire point of logging in real time.
If something goes wrong
“Log expense” button is greyed out. No active budget. Open /fund/budgets, create one, set it active, return.
Category dropdown is empty. The active budget has no categories defined. Open the budget, add categories (Security, Utilities, Repairs, Cleaning, and so on), and reopen the expense form.
Document upload fails. Check the file size; the limit is 5 MB. PDFs over 5 MB usually need to be re-exported as JPEGs. Convert and re-upload.
Wrong vendor name on the statement. Open the expense row, click the pencil icon, edit, save. The statement re-aggregates on the next view.
An expense reads as duplicated. You probably submitted the form twice on a slow network. Delete the duplicate. The audit trail records the deletion.
What’s next
At month-end (or quarter-end, depending on your reporting cycle), generate and publish the period’s statement. Read Viewing Statements for the publication flow and PDF download.