
Auto-debit is the surest path to a paid-on-time fund: Paystack charges each resident’s saved card on the contribution date, no chasing required. As estate manager, you do not enable auto-debit on a resident’s behalf — for security and compliance reasons, the resident must opt in themselves on their device after a card payment. Your role is to monitor take-up and nudge stragglers.
Who this is for
Estate managers who want to understand the auto-debit opt-in flow so they can explain it to residents and track the percentage of the fund on auto-debit.
What you’ll get done
A clear picture of which residents are on auto-debit, which are not, and a script for nudging the latter.
Before you start
A resident must have made at least one successful card payment through Tenantify. Bank transfer and USSD payments do not save an authorisation, so they do not unlock auto-debit.
How the resident enables auto-debit
The opt-in flow is two clicks for the resident:
- After a successful card payment, the resident lands on the payment-confirmation page (
/payments/fund/verify). A checkbox at the bottom reads “Enable auto-debit for future contributions”. - The resident ticks it and clicks Confirm.
That is the entire opt-in. The next contribution debits the saved card silently. Tenantify sends a reminder three days before each charge.
If the resident misses the checkbox on payment confirmation, they can also enable auto-debit later from Settings → Payment. There is no admin or EM-side button.
Steps to monitor take-up
1. Open the fund dashboard
Open Fund from the menu (URL: /fund). At the top, the dashboard surfaces an Auto-debit coverage card showing what percentage of accepted residents have auto-debit enabled.
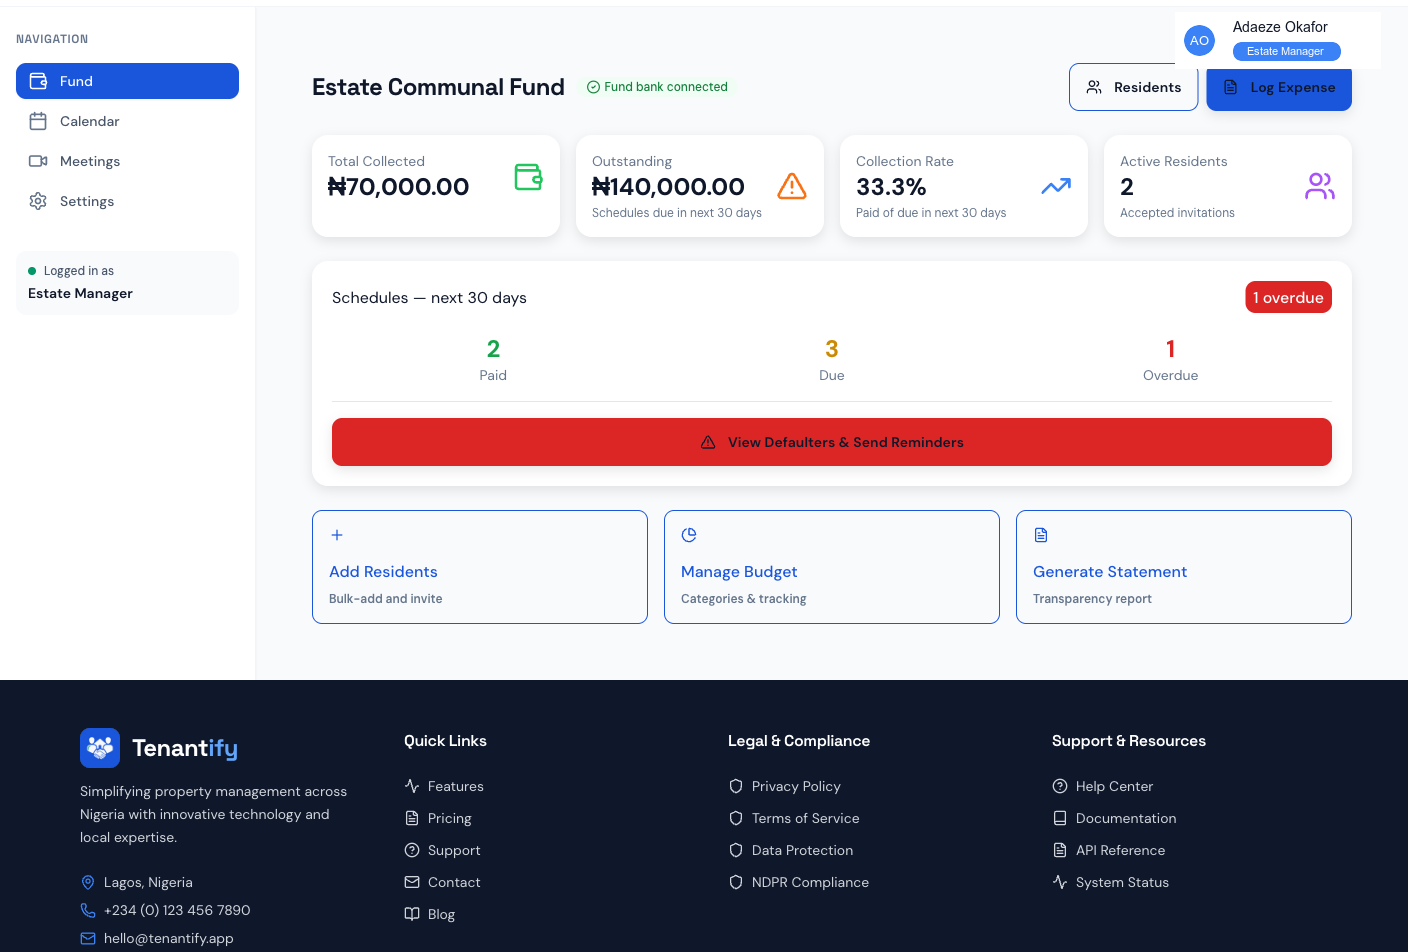
A healthy fund tends to be 70–90% on auto-debit. Lower than 50% usually means a recent fund launch or a wave of residents who paid by transfer.
2. Identify residents not on auto-debit
The dashboard’s contribution schedules surface a small lightning-bolt icon on rows where the resident has auto-debit enabled. Schedules without the icon belong to residents on manual payment. Note their names; you will nudge them in step 3.
The defaulter list (see Handling Defaulters) is a related signal — a resident who repeatedly appears there is a strong candidate for the auto-debit conversation.
3. Nudge residents off auto-debit
A typical nudge:
“Hi [Name], quick favour — auto-debit on the fund saves us both time. After your next card payment, you’ll see a checkbox to enable it. One tick, and future contributions go through without any reminders.”
Send the message via the same channel you use for defaulters — WhatsApp tends to win. Some managers send the nudge inside the period’s statement email; others use the defaulter follow-up window to mention it.
4. Confirm uptake the next billing period
After the next contribution cycle, return to the dashboard. The auto-debit coverage stat updates daily. Compare against the previous period to see whether your nudges moved the needle.
How auto-debit interacts with allocations
If you change a resident’s allocation amount (see Configuring Allocations), the next auto-debit charge picks up the new amount automatically. The resident receives the standard three-day reminder showing the new figure.
If a resident’s card expires or fails, auto-debit silently fails — Tenantify does not retry. The resident’s contribution stays PENDING and they appear on the defaulter list once their grace period elapses.
If something goes wrong
Resident insists they ticked the checkbox but auto-debit shows as “Not enabled”. Ask them to log in, open Settings → Payment, and look at the toggle. If it is off, ask them to enable it. If it is on but the dashboard does not reflect that, contact support — there may be a sync delay.
Auto-debit coverage stat shows 0%. The fund just launched or no one has paid by card yet. Encourage card payments for the first contribution.
Per-resident list missing a resident. That resident is in PENDING state — they have not accepted their invitation yet. Auto-debit can only be enabled after acceptance and a successful card payment.
A resident’s charge failed even though auto-debit is on. Card expired, bank blocked the transaction, or insufficient funds. The resident receives a notification. They need to pay manually for the period and either update the saved card (pay once by card, ticking save) or wait for the bank to resolve the block.
What’s next
Auto-debit is the cleanest collection lever, but residents who fall off it still need follow-up. Re-read Handling Defaulters for the WhatsApp + email cadence that closes the rest of the gap.